Introduction
This tutorial explains how to set up our DNSvizor solution.
If you find typos, or find parts difficult to understand, please report an issue or pull request at the source repository.
Deploy a DNSvizor unikernel
The DNSvizor unikernel provides a recursive DNS resolver, and a DHCP server. Its configuration is close to dnsmasq.
Installation
You can download the unikernel binary from our reproducible build infrastructure. Download the bin/dnsvizor.hvt artifact.
You need as well solo5-hvt which our reproducible build infrastructure builds for select platforms.
If we don’t build for your platform you need to build it yourself.
If you did all of that, skip to “DNSvizor Configuration”.
Building from source (alternative)
Here we document how to build the unikernel from source.
Prerequisites
First, make sure to have “opam” and “mirage” installed on your system.
Git repository
Do a git clone https://github.com/robur-coop/dnsvizor.git to retrieve the
source code of DNSvizor.
Building
Inside of the cloned repository, execute mirage configure (other targets are
available, please check the mirage documentation):
$ cd dnsvizor/mirage
$ mirage configure -t hvt
$ make
The result is a binary, dist/dnsvizor.hvt, which we will use later.
You can as well configure it with metrics which are reported to InfluxDB by using mirage configure -t hvt --enable-monitoring.
If this is built, there are several command line options available:
--net:management=tapXand--net-mac:management=MACthe TAP device and mac address of the management interface--ipv4-management=192.168.0.42/24the IPv4 address for the management interface--monitor=<IP>the IP address of the InfluxDB server--syslog=<IP>the IP address of the syslog server
Building solo5 from source (alternative)
See the instructions in doc/building.md in the Solo5 source tree.
DNSvizor Configuration
The configuration is passed via command-line arguments. If you’re lacking configuration options here, please open an issue at the dnsvizor repository.
Network configuration for the unikernel
All you need is a tap interface to run the unikernel on. You also need your unikernel to be reachable from the outside (on the listening port), and be able to communicate to the outside. There are multiple approaches to achieve this, we will focus on setting up your firewall for this:
$ sysctl -w net.ipv4.ip_forward=1
$ ip route list default | cut -d' ' -f5
eth0

# allow the server to communicate to the outside
$ sudo iptables -t nat -A POSTROUTING -s 10.0.0.0/24 -j MASQUERADE

# redirect port 80, 443 to the unikernel
$ sudo iptables -t nat -A PREROUTING -i eth0 -p tcp --dport 80 -j DNAT \
  --to-destination 10.0.0.2:80
$ sudo iptables -t nat -A PREROUTING -i eth0 -p tcp --dport 443 -j DNAT \
  --to-destination 10.0.0.2:443
Setting up the network interface:
$ sudo ip tuntap add mode tap tap0
$ sudo ip link set dev tap0 up
$ sudo ip addr add tap0 10.0.0.1/24
We’re all set now: the unikernel is allowed to communicate to the outside, ports 80 and 443 are forwarded to the unikernel IP address, and a tap0 interface exists where the host system has the IP address 10.0.0.1 configured.
Launching DNSvizor
To launch the unikernel, you need a solo5 tender (that the Building section already installed).
$ solo5-hvt --mem=96--net:service=tap0 --net-mac:service=00:80:41:ad:30:5e -- \
    dnsvizor.hvt --ipv4=10.0.0.2/24 --ipv4-gateway=10.0.0.1 --name=dnsvizor \
    --ca-seed=my-random-seed --password='my password'
Solo5-hvt options
The solo5-hvt arguments follow the overall pattern $ solo5-hvt <solo5-options> -- <kernel> <dnsvizor-arguments>.
The relevant solo5-options are:
--mem 96which allocates 96 MB of memory to dnsvizor. It can be omitted with a default allocation of 512 MB.--net:service=tap0tellssolo5-hvtto use the TAP interfacetap0for the unikernel networkservice. This is required for DNSvizor as it expects exactly one network namedservice.--net-mac:service=00:80:41:ad:30:5etellssolo5-hvtto assign the MAC address00:80:41:ad:30:5eto the unikernel networkservice. This is optional; if omitted a random MAC address is generated. Note that this may cause issues with ARP tables in the network.
DNSvizor options
In the above example DNSvizor gets the arguments --ipv4, --ipv4-gateway, --name, --ca-seed and --password.
For more information about DNSvizor arguments see DNSvizor options.
DNSvizor options
The options we pass to DNSvizor can be put into three overall categories:
All options with a description can be listed by running DNSvizor with --help as argument.
Note that you still need to pass a network device to solo5-hvt: solo5-hvt --net:service=tapX -- dnsvizor.hvt --help.
MirageOS options
These options relate to [MirageOS][https://mirageos.org], the library operating system used to build DNSvizor.
Network Options
These flags configure the underlying network interface and IP stack.
--ipv4=<PREFIX>: The IPv4 network address and prefix length for the unikernel (e.g.,10.0.0.2/24).--ipv4-gateway=<IP>: The IPv4 gateway address.--ipv4-only=<BOOL>: Restrict the unikernel to IPv4 only (default:false).--ipv6=<PREFIX>: The IPv6 network address and prefix length.--ipv6-gateway=<IP>: The IPv6 gateway address.--ipv6-only=<BOOL>: Restrict the unikernel to IPv6 only (default:false).--accept-router-advertisements=<BOOL>: Controls whether the unikernel accepts IPv6 Router Advertisements (default:true).
Logging Options
-l <LEVEL>or--logs=<LEVEL>: Set the log verbosity level.- Levels:
quiet,app,error,warning,info,debug.
- Levels:
Common Options
--name=<VAL>: The runtime name of the unikernel. This is used primarily for syslog identity. If omitted, it defaults to the configuration-time name.--delay=<INT>: Delays the startup bynseconds (default:0).
DNSvizor options
DNSvizor strives for a degree of compatibility with Dnsmasq. See the Dnsmasq Compatibility Guide for details on those options. Custom DNSvizor options include:
--hostname=<VALUE>: which would be equivalent of the hostname of a Dnsmasq setup - that is, the hostname you would find in /etc/hostname on a *NIX system.--https-port=<port>: the port for the DNSvizor https web interface.--dns-cache=<size>: the size of the DNS cache.--password=<VAL>: the password to authenticate for sensitive web interface endpoints (like configuration uploads or blocklist management). If not provided, these endpoints are not available.
Blocklist
You can add specific hostnames to the DNS block list via the command line. You can also specify a URL to a blocklist:
--dns-block=<hostname>: adds a specifichostnameto the DNS block list. May be repeated.--dns-blocklist-url=<url>: retrievesurland uses it as a DNS block list.
DNS resolver mode
DNSvizor is by default configured to do recursive DNS queries. It can be configured to ask a DNS resolver instead, and thus being a stub resolver:
--dns-upstream=<IP>: DNS queries are forwarded to the specified upstream IP address.
Privacy Features
DNSvizor implements modern RFCs to enhance privacy and security:
--qname-minimisation: Enables QNAME minimisation RFC 9156. This improves privacy by sending only the minimal necessary data to upstream authoritative nameservers.--opportunistic-tls-authoritative: Enables opportunistic TLS when contacting authoritative nameservers RFC 9539.
TLS support
For DNS-over-TLS, DNS-over-HTTP, and the web interface, DNSvizor generates its own CA and certificates. If you do not need these features, you can disable it with the option:
--no-tls: This option disables the web interface, DoT, and DoH.
The --ca-seed argument determines the private key generation. It accepts a base64-encoded string, optionally prefixed to specify the key type:
- RSA (Default):
rsa:BITS:BASE64_SEEDor justBASE64_SEED(defaults to 4096 bits). - Ed25519:
ed25519:BASE64_SEED.
To generate a secure, random base64-encoded 32-byte seed once and reuse it, you can use urandom:
# Generate a 32-byte seed encoded in base64
dd if=/dev/urandom bs=32 count=1 2>/dev/null | base64
Dynamic Updates RFC 2136
DNSvizor can update an external authoritative nameserver and requests a client_fqdn option RFC 4702 when a local DHCP client acquires a lease.
--dns-server=<IP>: The IP address of the external authoritative nameserver to update.--dns-key=<HOST:HASH:DATA>: The TSIG key required to authenticate the update.- Format:
name:hash_alg:base64_secret(e.g.,mykey:sha256:SGVsbG8=).
- Format:
When configured, if a DHCP client requests a hostname (via FQDN option), DNSvizor sends a TSIG-signed Dynamic DNS update packet (defined in RFC 2136) to the external server.
TLSTUNNEL Integration
DNSvizor supports integration with tlstunnel for updating SNI proxy rules dynamically.
--tlstunnel-server=<IP>: The IP address of the TLSTUNNEL server.--tlstunnel-key=<VAL>: The shared secret used to authenticate updates with the TLSTUNNEL server.
Web Interface & API
DNSvizor exposes a web-based management interface and a DNS-over-HTTPS (DoH) resolver.
Authentication
Access to sensitive endpoints (like the blocklist or configuration) requires authentication.
- Password Setup: Sensitive dashboard pages (for example, configuration updates) are protected by a password. Start the unikernel with the
--passwordargument to set the password required to access those endpoints See below which endpoints are password protected. - Method: The interface uses HTTP Basic Auth.
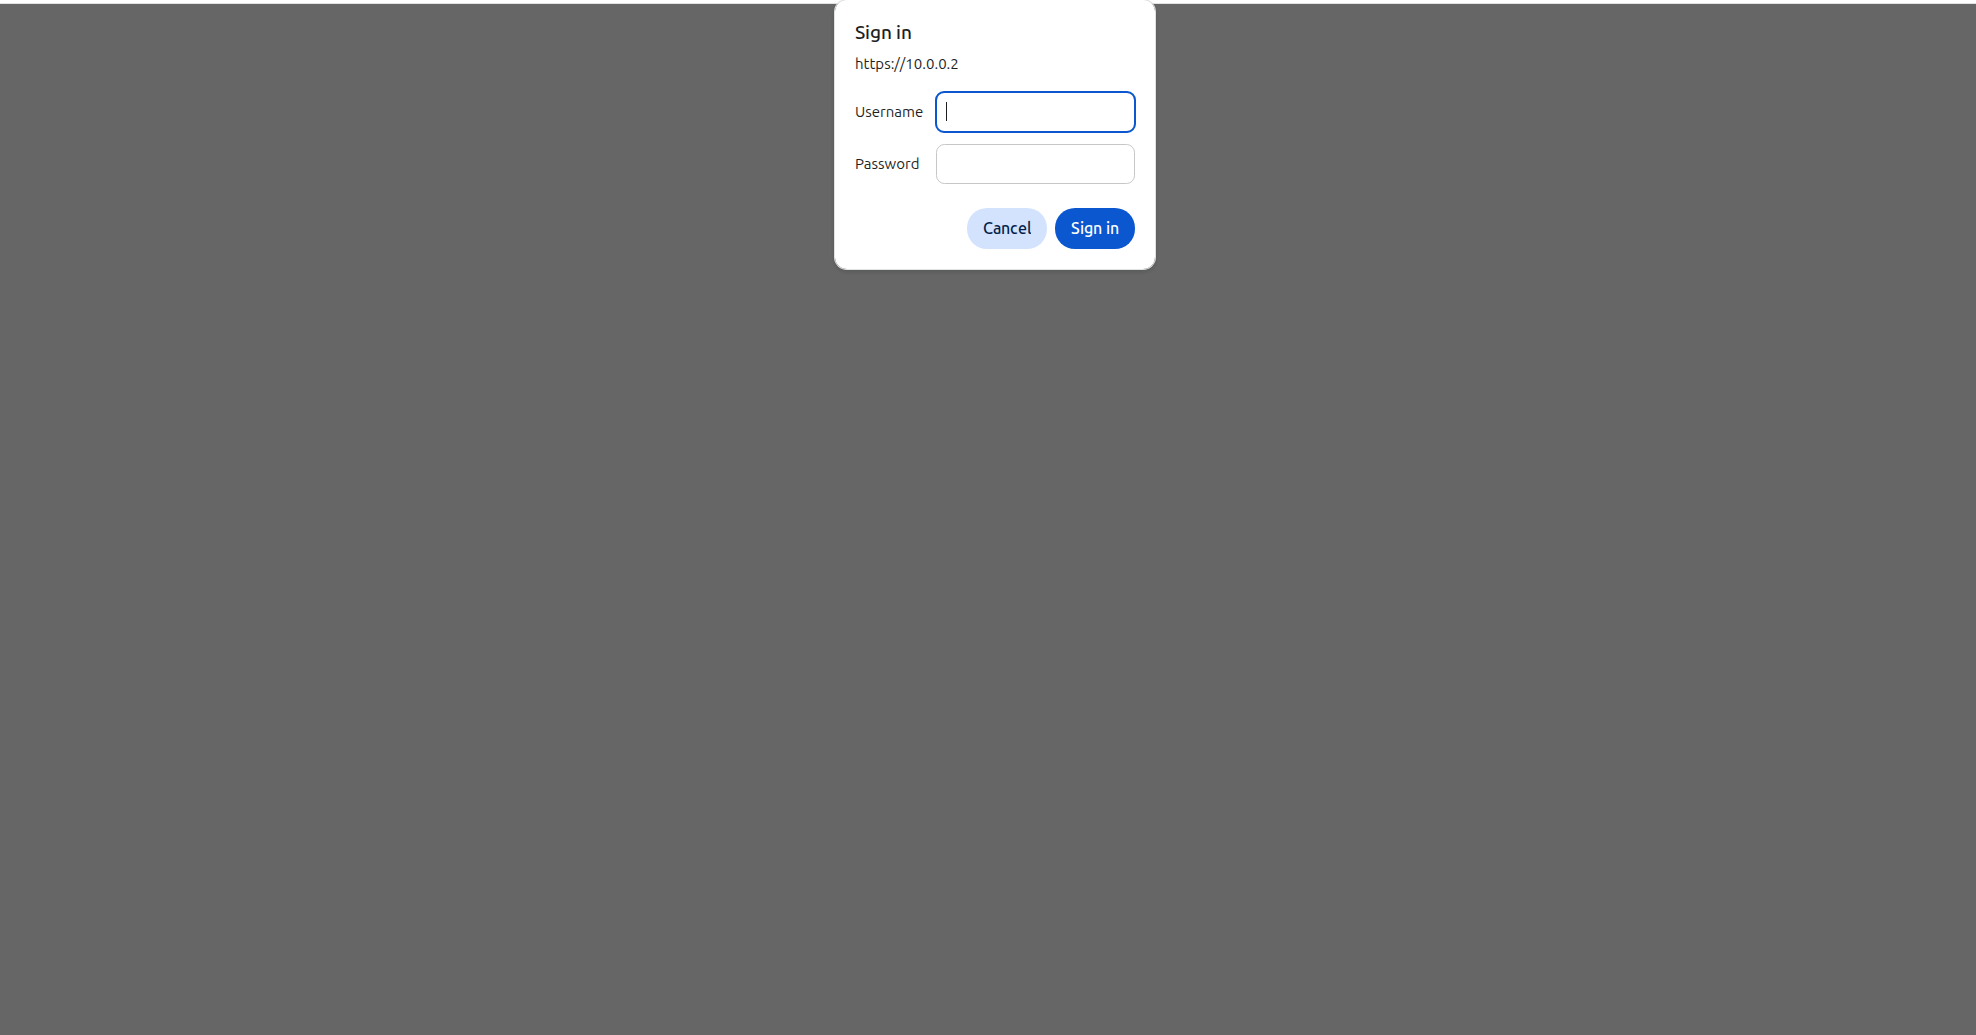
Any username will work, but the password must the be same password you provided as argument (--password) to the unikernel.
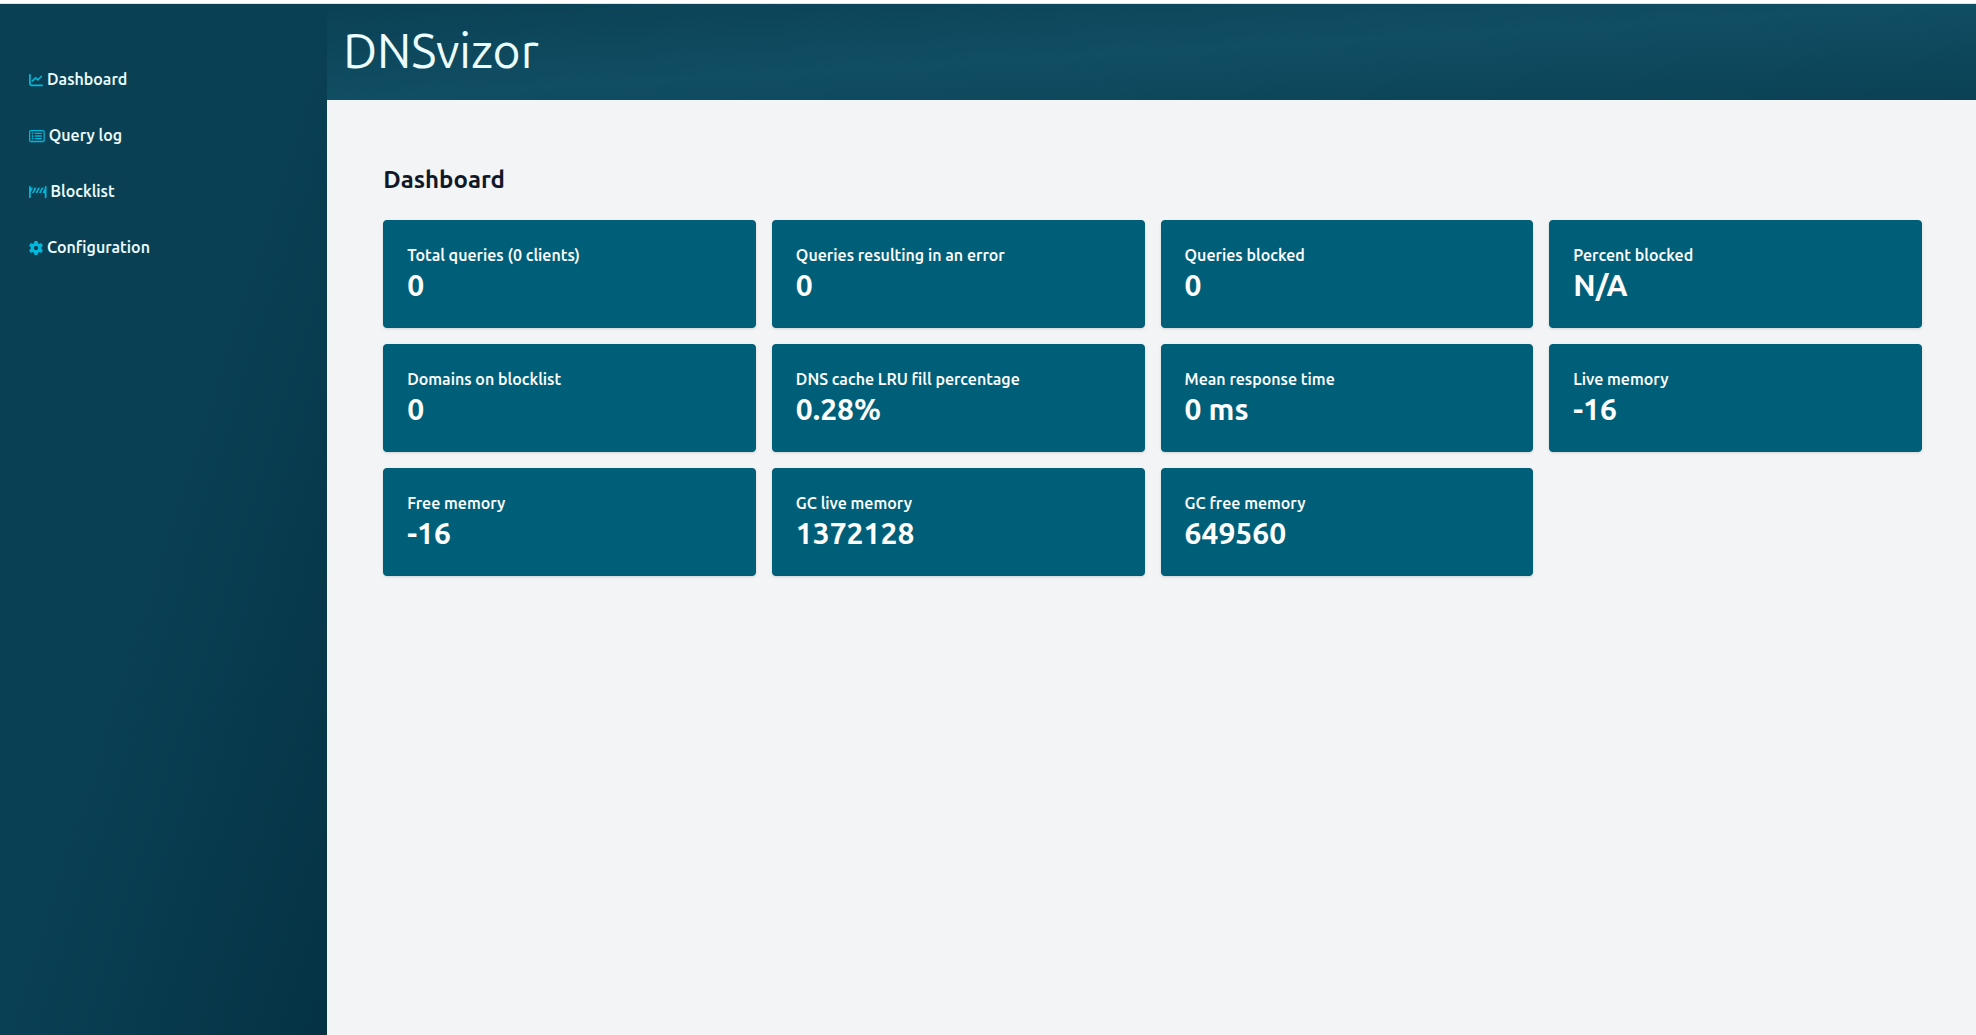
Dashboard Endpoints
The web server listens on the configured HTTPS port (default 443).
/or/dashboard- method:
GET - description: Displays statistics such as query rates etc.
- authenticated: false
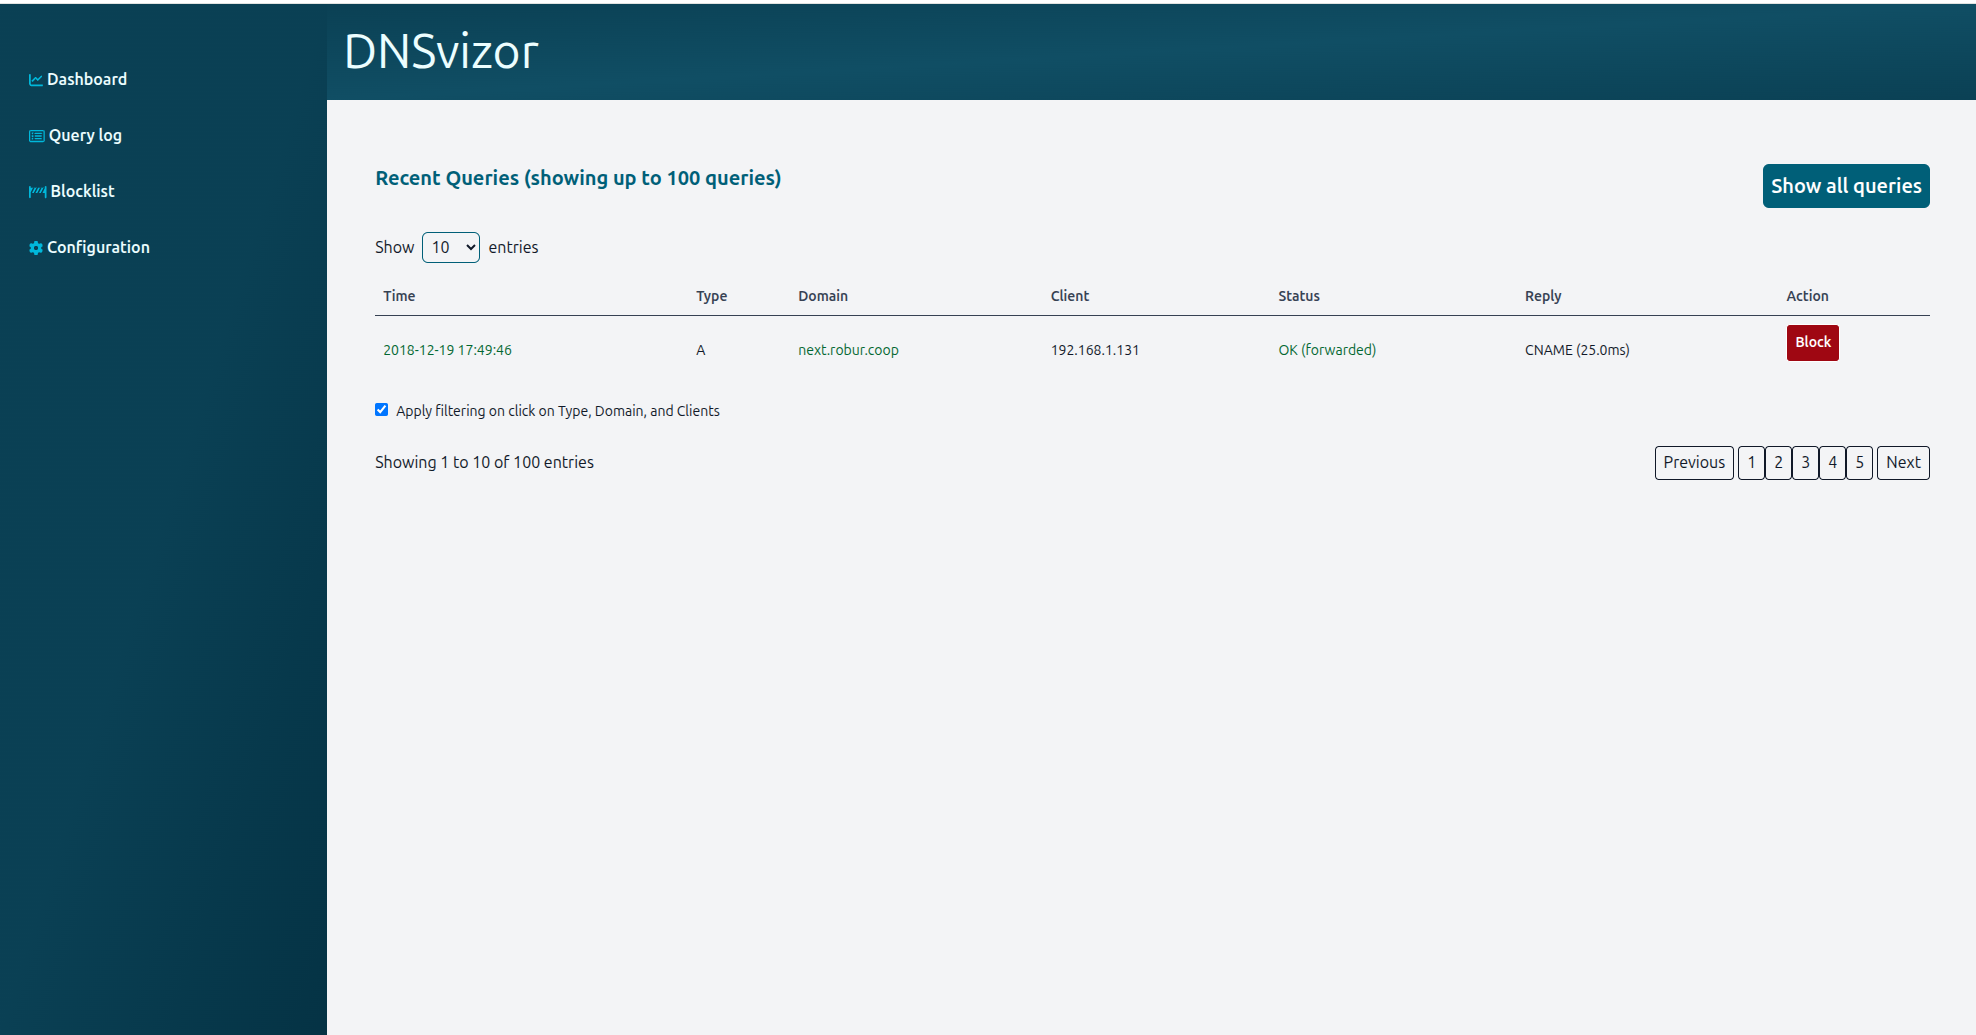
- method:
/querylog- method:
GET - description: Displays a log of recent DNS queries processed by the resolver.
- authenticated: false
- method:
-
/configuration- method:
GET - description: Displays the current configuration state.
- authenticated: true
- method:
-
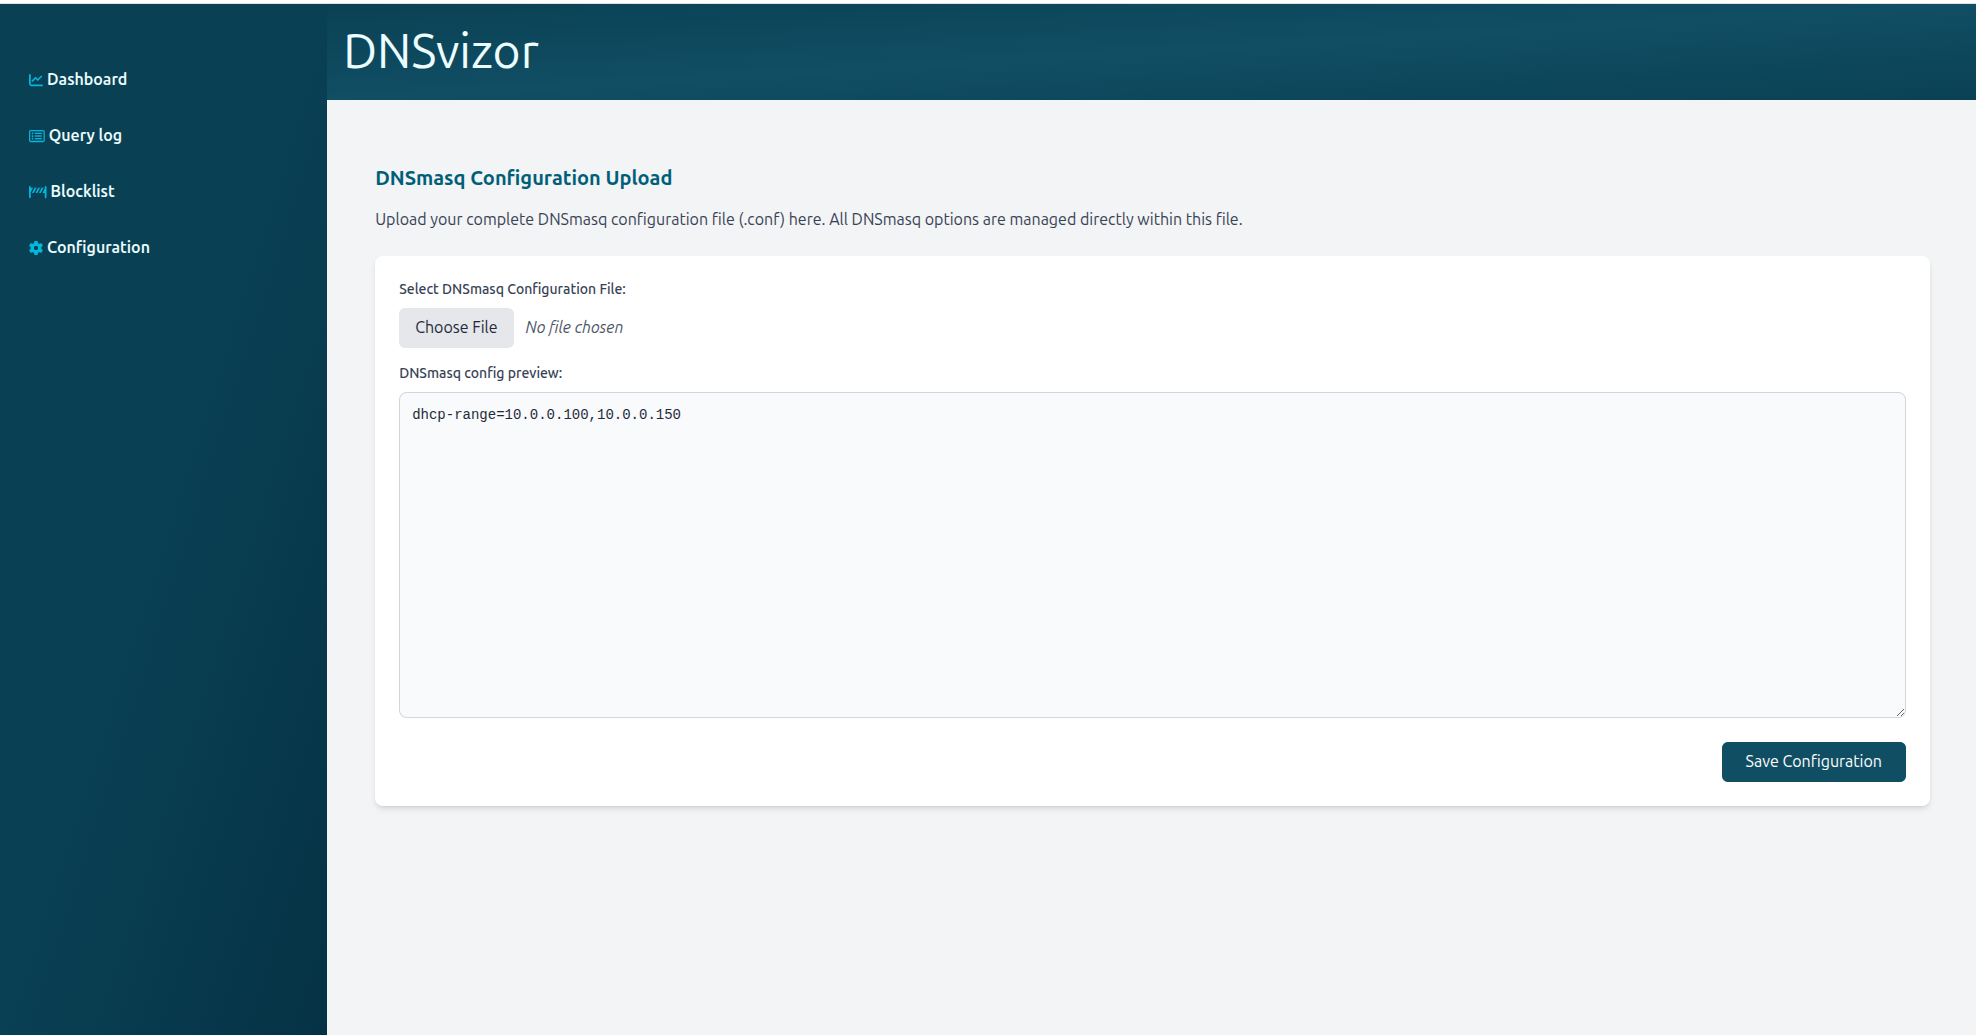
/configuration/upload-
method:
POST -
description: Allows uploading a new
dnsmasqconfiguration file (multipart form data). -
authenticated: true
-
Parameters:
-
dnsmasq_config: The file field containing the configuration text. -
Example with
curl:curl -u user:password -F "dnsmasq_config=@/path/to/your/dnsmasq.conf" https://<unikernel-ip>/configuration/upload
-
-
You can upload a Dnsmasq configuration file (txt file), and the contents of this file will be automatically loaded in the textarea where you can make modifications if necessary. When you are satisfied with the configuration, you can click on the “Save configuration” button to effect the changes.
Blocklist Management
DNSvizor allows managing blocked domains via the web interface. All endpoints related to the blocklist require authentication
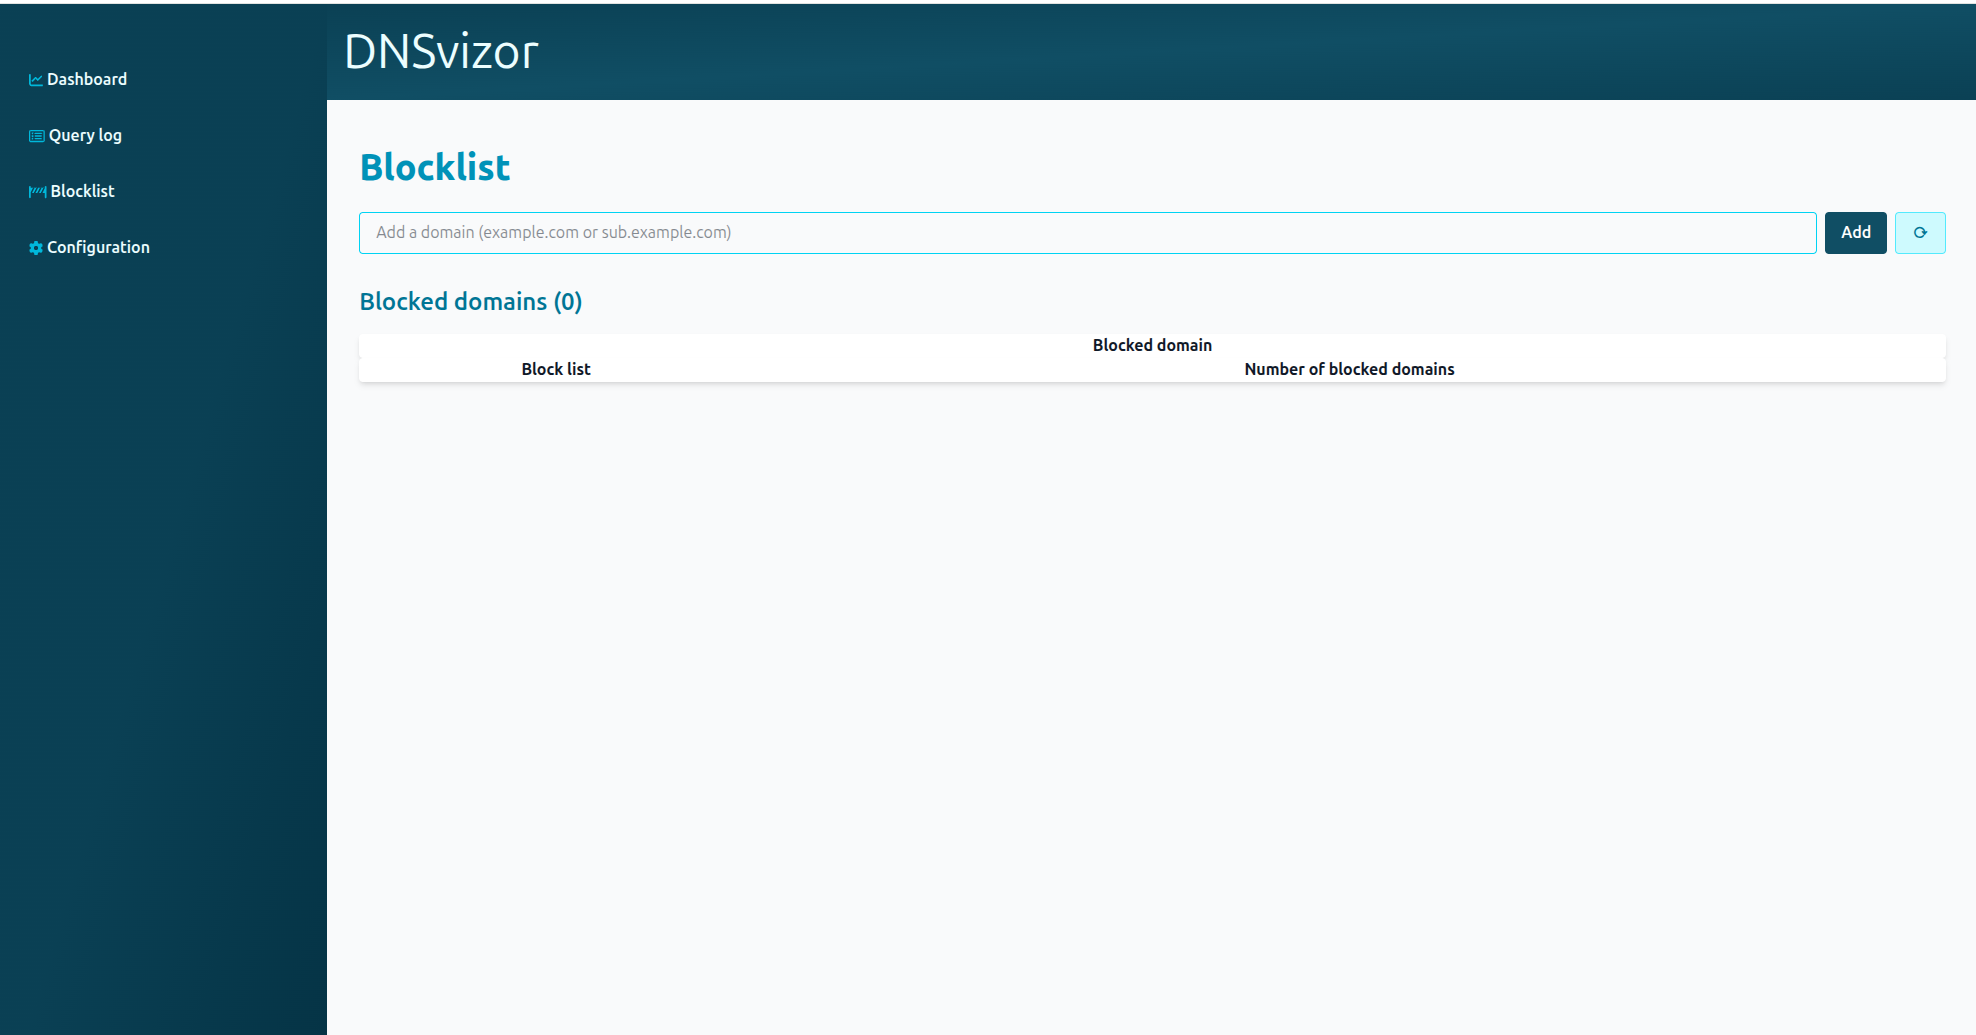
The block list page displays information about blocked domains.
-
At the top are the domains “manually” blocked either through boot arguments (see DNSvizor options) or via the web interface.
-
Each blocked domain can be unblocked by the “delete” button.
-
Below that is another list of remote block lists. There you find what block lists are used as well as the number of domains blocked through that block list source.
-
Finally, at the top you find a text input field where you can type in domains you want to block.
-
Next to the input field is a refresh button (“⟳”) that can be clicked to refresh the remote domain block lists. This operation may take some time.
| Endpoint | Method | Description |
|---|---|---|
/blocklist | GET | Lists all currently blocked domains. |
/blocklist/add | POST | Adds a domain to the blocklist. Expects multipart form data with field domain. |
/blocklist/delete/<domain> | POST | Removes <domain> from the blocklist. |
/blocklist/update | POST | Triggers an immediate update of the blocklists from the configured URLs. |
DNS-over-HTTPS (DoH)
The unikernel implements a compliant DNS-over-HTTPS resolver RFC 8484.
- Endpoint:
/dns-query - Supported Methods:
-
GET: Expects a base64url-encoded DNS query in the?dns=query parameter. -
POST: Expects the raw DNS query in the body withcontent-type: application/dns-message.-
GET example (Base64url encoded): This method uses a base64url-encoded DNS query string.
# Query for 'robur.coop' (A record) encoded in base64url curl "https://<unikernel-ip>/dns-query?dns=XYIBIAABAAAAAAABBXJvYnVyBGNvb3AAAAEAAQAAKQTQAAAAAAAMAAoACLyE16zqPB6E" # Use dig (from bind-utils) dig @<unikernel-ip> +https-get a robur.coop -
POST example assuming ‘query.bin’ contains a raw DNS query packet
curl -X POST -H "Content-Type: application/dns-message" --data-binary @query.bin https://<unikernel-ip>/dns-query dig @<unikernel-ip> +https a robur.coop -
-
Dnsmasq Compatibility Guide
DNSvizor tries to parse dnsmasq style configuration files and arguments. However, not all options are fully implemented. This section details which options are safe to use. If you use Dnsmasq and are missing any options in DNSvizor please [reach out to us][https://robur.coop/Contact].
Supported Options
These options are fully implemented and affect the unikernel’s behavior:
--dhcp-range: Sets the IP range for the DHCP server. Note: Currently supportsstart,end,lease_timeorstart,lease_timeformats.--domain: Sets the local domain name for the network.--no-hosts: Prevents reading local hostnames (only uses the--nameargument).--dnssec: Enables DNSSEC validation.--dhcp-host: Adds a static host entry.--dhcp-option: Adds custom DHCP options, currently only “log-server” is supported.
Ignored Options
The following options are parsed (so they won’t break your existing config scripts) but are explicitly ignored by DNSvizor. They have no effect on the unikernel:
--interface--except-interface--listen-address--bind-interfaces--no-dhcp-interface